

VIDEO TUTORIAL:
Before starting, here are a few tips for finding the right sweater to use for your project:
- To find your sweater, look in your closet or take a trip to your local thrift store.
- The sweater can be knitted, or if you don’t want something that bulky, you can just use any long-sleeved shirt that is made from stretchy material.
- Before buying/using, make sure you hold the sleeve up to the place where you will be wearing your new item (calf, wrist, head).
- As far as circumference goes around your calf or arm, most sweaters stretch. A good tip for choosing the right fit is to buy the size of sweater that you would if you were going to be wearing it.
- Consider the color, material, and size when finding your sweater.
BOOT SOCKS:
You will be using the two sleeves of your sweater for this project. If you are not a sewer, this project could be done with no sewing at all, or little sewing for a more detailed look.
1. Cut the sleeves off of your sweater after measuring the length of your calf/boot. Start measuring from right above your ankle bone.
a. For the non-sewers, this is all. Your boot socks won’t be detailed, but if you choose the right sweater, sometimes it will look cute to have knitted sweaters poke out the top of your boot without anything added to the top.
b. For those of you who do sew, you can add lace to the top of your socks, or any other trim that you find appealing.
WRIST WARMERS:
You will be using the two sleeves of your sweater for this project. If you aren’t a sewer and have no-fray material, you can do this project with no sewing. Sewing will give it a more dressed-up and detailed look.
1. Cut the sleeve off of your shirt after measuring how high up on your forearm you want your wrist warmers to go. Measure from the knuckle of your thumb.
2. If you sew, you can add anything to dress up your wrist warmers. Lace, ruffles, buttons, bows, apparel trim, etc.
*These wrist warmers are cute to wear over your long-sleeved shirts, or over top of your gloves!
*WANT TO MAKE BABY LEGS?? Just use this same tutorial!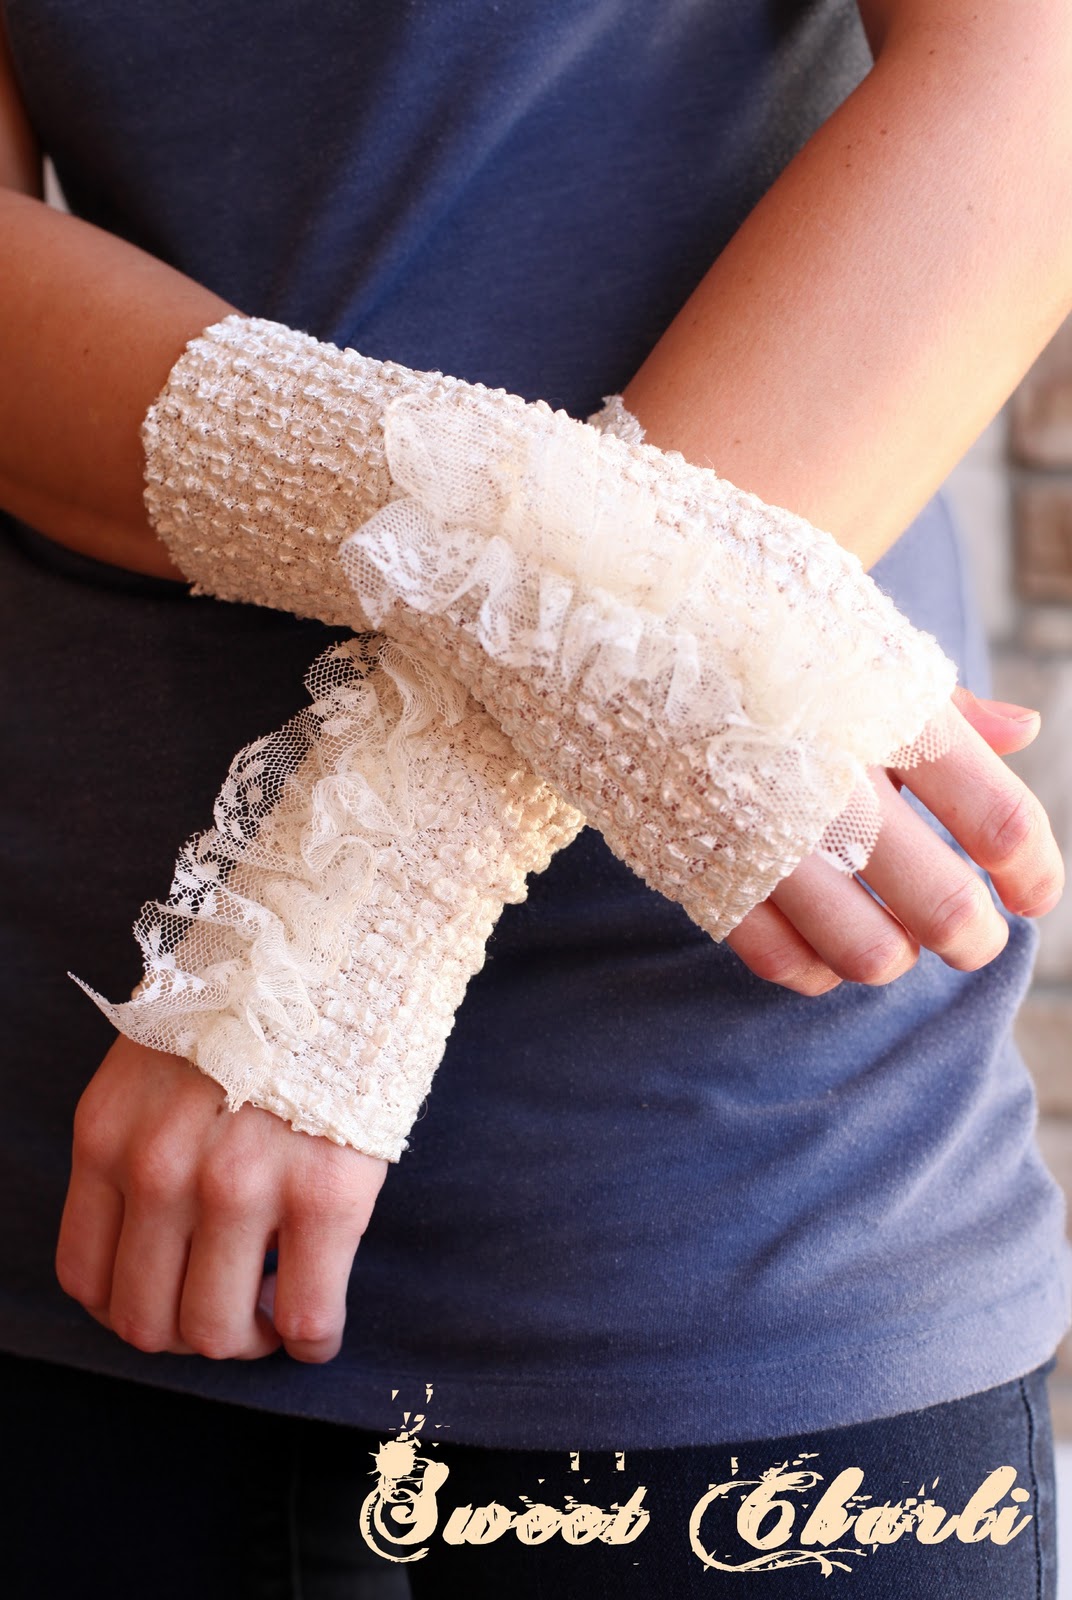

EAR WARMERS:
This project looks best when using a chunky, knitted sweater. You will not be using the sleeve for this, you will be cutting into the body of the sweater. *make sure that your sweater is long enough vertically to fit the circumference of your head.
1. Measure the circumference of your head and cut along the knitted pattern vertically in your sweater. Round the edges of the ends to give it a more finished look.
a. For all you non-sewers, the only thing left you need to do is hand sew a button on where the two ends meet. Then cut a small slit in the other end big enough for the button to go through. That’s it!
b. For all you sewers, you can machine sew the two ends together if you fill it would be a stronger hold than just using a button
2. Add anything you desire to your headband: flowers, jewels, buttons, etc. Because most knitted sweaters already have holes in them, you can use alligator clip flowers, etc, on your ear warmers to give them different looks to match the outfit you will be wearing! Genius!


I can’t wait! The boot socks and hand warmers have been on my to do list. I just haven’t had time yet. I have a whole stack of sweaters ready for a new mission in life!
Oh my goodness…..just watched you on KSL5 and these are amazing!!! I have to make these for my daughter!! Thanks a bunch! Oh….I wish you had a SUBSCRIPTION BUTTON on your blog 🙂