
I have had the opportunity to meet Tausha, from Sassy Style Redesign in real life and am so glad we are doing a swap today. You are lucky to get to hear from her today on how to make old pillows into outdoor pillows with nothing but a can of spray paint (her favorite) Here she is!!
Hey Sweet Charli Readers…
I am thrilled to be visiting you all today.
I am lucky enough to know Kami in “real life” and
yes, she is as darling and fabulous in real life as she seems.
Before I got to the fabulous Spray Painted Pillows-I thought I would tell you a little bit about me.
I’m Tausha-a sassy home redesigner. Mom of 3 chickadees,
wife to a fabulous man and spray paint diva extrodinair.
I love to craft, thrift shop, spray paint and eat chocolate.
I love diet coke and re-arranging my furniture way more than one should.
I have a blog:
I love to have an outlet to show my creations-whether they are crappy or not.
I love to spray paint-so I thought that I would tell all of you how I use the can in this post:
I also love my glue gun-I used it a ton on these
I also have the fabulous opportunity to be on TV here in Utah. I get to go on a
local show here Studio 5,
and share my tips and tricks on how to make your house a home-
a space that I love.
If you want to watch some of my past segments-
Last but not least-I am a sassy redesigner with my mom. We have our own business and we love it!
We come into your home and redo with what you have.
We add those cozy touches to your home that you always wanted, but weren’t too sure how to achieve them. We love to share our love with others, so if you are interested, we do
speaking engagements. (rs activites)
Ok-I will shut up about me and talk about the Spray Painted Pillows.
Yes-I love spray painting, but up until last week, I had no idea that you could spray paint pillows.
I picked up some pillows at thrift store for a buck and thought-“well, if it doesn’t work, I’m out a dollar”

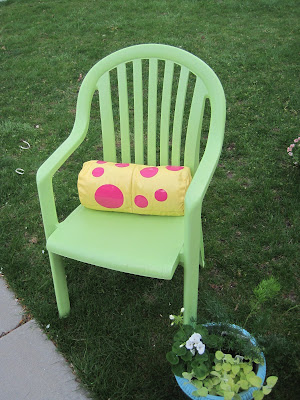
I primed the leather pillow first.
The hardest part to this step was waiting for it to dry. I am sooo inpatient!
When the pillow was all the way dry I then sprayed a coat of Rustoleum 2x coverage in a pretty yellow.
I then waited for that to dry.

I wanted it to be fun-so I added some vinyl polka dots that I cut with my cricut.
I finished with a coat of outdoor poly-urethane.
I loved how it turned out!!!
So cute and sooo much cheaper than outdoor pillows for your yard.
Plus-You can customize to whatever color you want!!
This pillow was done a little bit different.
It started out as a plain white pillow form.
I sprayed it with Rustoleum 2x coverage in Apple green first.
Let it dry.
Then I added some more vinyl polka dots in different sizes. These were my stencil.
After I stuck those on nice and tight-I sprayed the whole pillow with Rustoleum 2x coverage in Aqua.
I then waited for it to dry-and then pulled off the polka dots.
Now-this pillow was a litle stiff. If you have ever had outdoor pillows before-they are kind of stiff and not soft anyway.
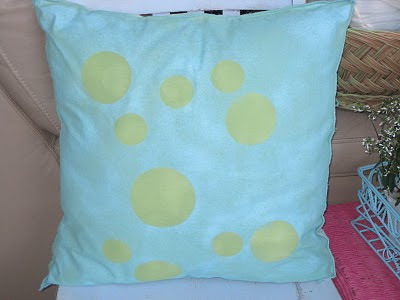
So..there you have it-2 outdoor pillows done under $5 in the colors of your choice!!
Happy Day!
Now, go out and spray something-it always make my day a little brighter!
Until then…
Have a Sassy Day!
♥ Tausha


Great idea! I love the polka dot pillow using the vinyl stickers!
Love the designs! very cute and easy on the eyes. hey, if you are interested on some more neat outdoor pillows you can look in my site http://www.outdoorcushionspillows.com/
thanks